Excel'den tüm resimleri nasıl tek seferde dışa aktarabilirim?
Diyelim ki çalışma kitabınızda birçok resim var ve bunları bir kerede belirli bir klasöre kaydetmek istiyorsunuz, normalde bu resimleri manuel olarak teker teker kopyalayıp yapıştırarak kaydedebilirsiniz, ancak bu şekilde sürekli kopyalayıp yapıştırmak zaman alıcı olabilir. Burada, bu işi çözmek için size bazı ipuçları tanıtacağım.
Farklı Kaydet fonksiyonu ile Excel'den tüm resimleri tek seferde dışa aktarma
Excel'in yerleşik Farklı Kaydet fonksiyonu ile, tüm grafikler, şekiller ve diğer nesneler dahil olmak üzere bir çalışma kitabını Web Sayfası olarak kaydedebilirsiniz. Lütfen şu adımları izleyin.
1. Kaydetmek istediğiniz resimlerle çalışma kitabını açın. Dosya > Farklı Kaydet > Gözat'a tıklayın.

2. Farklı Kaydet iletişim kutusunda şunları yapmanız gerekiyor:

3. Açılan Microsoft Excel iletişim kutusunda Evet düğmesine tıklayın.

4. Dışa aktarılan dosyaların kaydedildiği klasörü açın ve içerde bir klasör ile bir HTML formatlı dosyanın listelendiğini göreceksiniz. Çalışma kitabındaki tüm resimler, grafikler, şekiller veya nesneler bu klasöre kaydedilmiştir.

5. Klasörde ihtiyacınız olan resimleri tutabilir ve ihtiyaç duymadığınız diğerlerini silebilirsiniz.
Harika bir araçla Excel'den tüm resimleri kolayca tek seferde dışa aktarma
Yukarıdaki yöntem, çalışma kitabındaki tüm nesneleri çıkaracaktır, belki de bunların bazılarına ihtiyacınız yoktur. Eğer Excel'de Kutools for Excel yüklüyse, Grafikleri Dışa Aktar özelliği yalnızca ihtiyacınız olan resimleri kaydetmenize yardımcı olabilir.
1. Kutools Plus > İçe Aktar & Dışa Aktar > Grafikleri Dışa Aktar'a tıklayın:

2. Grafikleri Dışa Aktar iletişim kutusunda, lütfen şu şekilde yapılandırın:

3. Ardından, kaç tane resmin başarıyla dışa aktarıldığını bildiren bir iletişim kutusu açılır, Tamam düğmesine tıklayın.
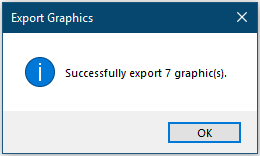
Şimdi hedef klasöre gidip dışa aktarılan resimleri kontrol edebilirsiniz.
Bu özelliğin daha fazla bilgi için lütfen Grafikleri Dışa Aktar'a tıklayın.
Kutools for Excel'i uygulamadan önce, lütfen önce indirip yükleyin.
Resimleri bitişik hücre değerleriyle yeniden adlandırarak dışa aktarma
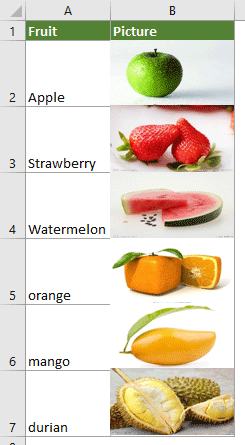
Aşağıdaki ekran görüntüsünde gösterildiği gibi, iki sütun bulunmaktadır, birinde meyve isimlerinin listesi yer alırken, diğeri meyvelere karşılık gelen resimleri içerir. Bu resimleri dışa aktarmak ve otomatik olarak ilgili meyve isimleriyle adlandırmak için bu bölümdeki VBA kodunu deneyebilirsiniz.
1. Resimleri dışa aktarmak istediğiniz çalışma sayfasında, Microsoft Visual Basic for Applications penceresini açmak için Alt + F11 tuşlarına basın.
2. Microsoft Visual Basic for Applications penceresinde Ekle > Modül'e tıklayın. Ardından aşağıdaki VBA'yı Modül penceresine kopyalayın.
VBA kodu: Bir sütundaki resimleri dışa aktar ve otomatik olarak adlandır
Sub ExportImages_ExtendOffice()
'Updated by Extendoffice 20220308
    Dim xStrPath As String
    Dim xStrImgName As String
    Dim xImg As Shape
    Dim xObjChar As ChartObject
    Dim xFD As FileDialog
    Set xFD = Application.FileDialog(msoFileDialogFolderPicker)
    xFD.Title = "Please select a folder to save the pictures" & " - ExtendOffice"
    If xFD.Show = -1 Then
       xStrPath = xFD.SelectedItems.Item(1) & "\"
    Else
        Exit Sub
    End If

    On Error Resume Next
    For Each xImg In ActiveSheet.Shapes
        If xImg.TopLeftCell.Column = 2 Then
        xStrImgName = xImg.TopLeftCell.Offset(0, -1).Value
        If xStrImgName <> "" Then
            xImg.Select

            Selection.Copy
            Set xObjChar = ActiveSheet.ChartObjects.Add(0, 0, xImg.Width, xImg.Height)
            With xObjChar
                .Border.LineStyle = xlLineStyleNone
                .Activate
                ActiveChart.Paste
                .Chart.Export xStrPath & xStrImgName & ".png"
                .Delete
            End With
        End If
        End If
    Next
End Sub
Notlar:
3. Kodu çalıştırmak için F5 tuşuna basın. Açılacak pencerede, resimleri kaydetmek için bir klasör seçin ve ardından Tamam'a tıklayın.

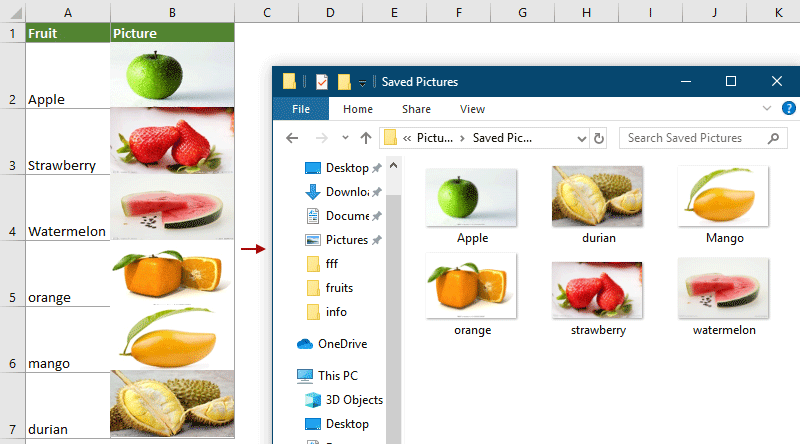
Ardından, belirtilen sütundaki tüm resimler dışa aktarılır ve belirttiğiniz şekilde bitişik hücre değerleriyle otomatik olarak adlandırılır.
İlgili makale:
Excel'de grafikleri nasıl grafiklere aktarabilirim?
En İyi Ofis Verimlilik Araçları
Kutools for Excel ile Excel becerilerinizi güçlendirin ve benzersiz bir verimlilik deneyimi yaşayın. Kutools for Excel, üretkenliği artırmak ve zamandan tasarruf etmek için300'den fazla Gelişmiş Özellik sunuyor. İhtiyacınız olan özelliği almak için buraya tıklayın...
Office Tab, Ofis uygulamalarına sekmeli arayüz kazandırır ve işinizi çok daha kolaylaştırır.
- Word, Excel, PowerPoint'te sekmeli düzenleme ve okuma işlevini etkinleştirin.
- Yeni pencereler yerine aynı pencerede yeni sekmelerde birden fazla belge açıp oluşturun.
- Verimliliğinizi %50 artırır ve her gün yüzlerce mouse tıklaması azaltır!
Tüm Kutools eklentileri. Tek kurulum
Kutools for Office paketi, Excel, Word, Outlook & PowerPoint için eklentileri ve Office Tab Pro'yu bir araya getirir; Office uygulamalarında çalışan ekipler için ideal bir çözümdür.
- Hepsi bir arada paket — Excel, Word, Outlook & PowerPoint eklentileri + Office Tab Pro
- Tek kurulum, tek lisans — dakikalar içinde kurulun (MSI hazır)
- Birlikte daha verimli — Ofis uygulamalarında hızlı üretkenlik
- 30 günlük tam özellikli deneme — kayıt yok, kredi kartı yok
- En iyi değer — tek tek eklenti almak yerine tasarruf edin