Excel'de belirli bir hücre aralığından e-posta nasıl gönderilir?
Birçok durumda, Excel çalışma sayfasındaki belirli bir içerik aralığı e-posta iletişimlerinizde faydalı olabilir. Bu makalede, Excel'de doğrudan e-posta gövdesine belirli bir aralık ekleyerek e-posta gönderme yöntemini tanıtacağız.
Excel'de belirli bir hücre aralığından e-posta gönderin
Harika bir araçla belirli bir hücre aralığından e-posta gönderin
Excel'de e-posta gönderme hakkında daha fazla öğretici...
Excel'de belirli bir hücre aralığından e-posta gönderin
Aşağıdaki VBA kodu, bir aralığı kopyalayıp doğrudan Excel'deki bir Outlook e-posta gövdesine yapıştırmanıza yardımcı olabilir. Lütfen aşağıdaki adımları izleyin.
1. Kopyalamak istediğiniz aralığı içeren çalışma sayfasında, "Microsoft Visual Basic for Applications" penceresini açmak için "Alt + F11" tuşlarına aynı anda basın.
2. Açılan "Microsoft Visual Basic for Applications" penceresinde, aşağıdaki ekran görüntüsünde gösterildiği gibi "Tools" > "References" seçeneğine tıklayın.
3. "References – VBAProject" iletişim kutusunda, "Microsoft Outlook Object Library" seçeneğini bulun ve işaretleyin, ardından Tamam düğmesine tıklayın.

4. "Insert" > "Module" seçeneğine tıklayın, ardından aşağıdaki VBA kodunu Module penceresine kopyalayıp yapıştırın.
VBA kodu: Excel'de belirli bir aralıkla e-posta gönderme
Sub Send_Email()
'Updated by Extendoffice 20200119
    Dim xRg As Range
    Dim I, J As Long
    Dim xAddress As String
    Dim xEmailBody As String
    Dim xMailOut As Outlook.MailItem
    Dim xOutApp As Outlook.Application
    On Error Resume Next
    xAddress = ActiveWindow.RangeSelection.Address
    Set xRg = Application.InputBox("Please select range you need to paste into email body", "KuTools For Excel", xAddress, , , , , 8)
If xRg Is Nothing Then Exit Sub
Application.ScreenUpdating = False
    Set xOutApp = CreateObject("Outlook.Application")
    Set xMailOut = xOutApp.CreateItem(olMailItem)
    For I = 1 To xRg.Rows.Count
        For J = 1 To xRg.Columns.Count
            xEmailBody = xEmailBody & "  " & xRg.Cells(I, J).value
        Next
        xEmailBody = xEmailBody & vbNewLine
    Next
    xEmailBody = "Hi" & vbLf & vbLf & " body of message you want to add" & vbLf & vbLf & xEmailBody & vbNewLine
    With xMailOut
        .Subject = "Test"
        .To = "happy.xuebi@163.com"
        .Body = xEmailBody
        .Display
        '.Send
    End With
    Set xMailOut = Nothing
    Set xOutApp = Nothing
    Application.ScreenUpdating = True
End SubNotlar:
- 1). Lütfen bu komut satırındaki e-posta gövdesini ihtiyaçlarınıza göre değiştirin:
xEmailBody = "Merhaba" & vbLf & vbLf & "eklemek istediğiniz mesajın içeriği" & vbLf & vbLf & xEmailBody & vbNewLine . - 2). Lütfen kod içindeki bu satırda e-posta alıcısını ve konuyu belirtin:
(.To = happy.xuebi@163.com and .Subject = "test").
5. Kodu çalıştırmak için F5 tuşuna basın. Açılan Kutools for Excel iletişim kutusunda, e-posta gövdesine yapıştırmak istediğiniz aralığı seçin ve ardından Tamam düğmesine tıklayın. Ekran görüntüsüne bakın:

6. Şimdi, belirli bir alıcı, konu, gövde ve seçilen Excel aralığıyla bir e-posta oluşturulmuştur, lütfen bu e-postayı göndermek için "Gönder" düğmesine tıklayın. Gösterilen ekran görüntüsüne bakın.

Not: VBA kodu yalnızca Outlook'u e-posta programınız olarak kullandığınızda çalışmaktadır.
Harika bir araçla belirli bir hücre aralığından e-posta gönderin
Eğer Outlook kullanmıyorsanız ve yine de Excel'de doğrudan belirli bir aralık verisi eklenmiş olarak e-posta göndermek istiyorsanız, size Kutools for Excel'in "E-posta Gönder" özelliğini kesinlikle öneririm. Bu özellik sayesinde, sadece bir e-posta adresinin giden sunucusunu yapılandırmanız yeterlidir ve gelecekte bu e-posta adresi üzerinden Excel'de doğrudan e-postalar gönderebilirsiniz.
1. İlk olarak, gerekli alanları içeren bir posta listesi hazırlamanız gerekiyor.
- İpuçları: Posta listesi en az 2 satır içermelidir ve ilk satır başlıklar olmalıdır (Diyelim ki Excel'deki iki e-posta adresine e-posta göndermek istiyorsunuz, lütfen aşağıdaki ekran görüntüsünde gösterildiği gibi bu iki e-posta adresini “E-posta” başlığı altında yazın).

- Alternatif olarak, Posta Listesi Oluştur özelliğiyle kolayca bir posta listesi oluşturabilirsiniz.

2. E-posta gövdesine eklemek istediğiniz aralığı seçin ve Ctrl + C tuşlarına basarak kopyalayın.
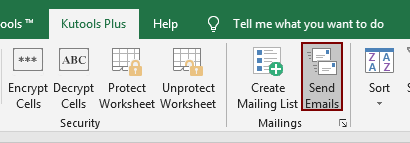
3. Tüm posta listesini (başlıklar dahil) seçin, "Kutools Plus" > "E-postaları Gönder" seçeneğine tıklayın. Ekran görüntüsüne bakın:
4. Ardından "E-postaları Gönder" iletişim kutusu açılır.
- 4.1) Seçilen posta listesinin öğeleri ilgili alanlara doldurulur (ihtiyaçlarınıza göre posta listesine daha fazla alan ekleyebilirsiniz);
- 4.2) E-posta gövdesi kutusuna tıklayın, Ctrl + V tuşlarına basarak seçilen aralık verilerini buraya yapıştırın. Daha sonra ihtiyacınız olan diğer içerikleri ekleyin;
- 4.3) "Outlook kullanarak e-posta gönder" kutusunun işaretini kaldırın;
- 4.4) "SMTP Ayarları" düğmesine tıklayın. Ekran görüntüsüne bakın:


5. Ardından "SMTP Ayarları – Yeni Düzen" iletişim kutusu açılır. Lütfen e-posta adresini sunucu ayarlarıyla doldurun, "Gönderilen E-postaları Kaydet" kutusunu işaretleyerek tüm gönderilen e-postaları kaydedilecek bir klasör belirtin ve ardından ayarları kaydetmek için Tamam düğmesine tıklayın.

6. "E-postaları Gönder" iletişim kutusuna geri döndüğünde, e-postayı göndermek için "Gönder" düğmesine tıklayın.
Excel için Kutools - Excel için 300 adet temel araç içeren bir paket. Sürekli ücretsiz AI özellikleriyle çalışın! Hemen indirin!
İlgili makaleler:
Excel'de hücrelerde belirtilen e-posta adreslerine e-posta gönderme
Diyelim ki bir e-posta adresi listesi var ve bu e-posta adreslerine Excel'de doğrudan toplu olarak e-posta göndermek istiyorsunuz. Bunu nasıl başarabilirsiniz? Bu makale, Excel'deki hücrelerde belirtilen birden fazla e-posta adresine e-posta gönderme yöntemlerini gösterecektir.
Excel'de e-posta gönderirken Outlook imzasını ekleme
Diyelim ki Excel'de doğrudan bir e-posta göndermek istiyorsunuz, bu e-postaya varsayılan Outlook imzasını nasıl eklersiniz? Bu makale, Excel'de e-posta gönderirken Outlook imzasını eklemenize yardımcı olacak iki yöntem sunar.
Excel'de birden fazla ekli dosya ile e-posta gönderme
Bu makale, Excel'de birden fazla ekli dosya ile Outlook üzerinden e-posta göndermeyi ele almaktadır.
Excel'de son teslim tarihi gelmişse e-posta gönderme
Örneğin, C sütunundaki son teslim tarihi 7 günden küçük veya eşitse (şu anki tarih 2017/9/13), o zaman A sütunundaki belirli alıcıya B sütunundaki belirli içerikle bir e-posta hatırlatması gönderin. Bunu nasıl başarabilirsiniz? Bu makale, bunu detaylı olarak ele almak için bir VBA yöntemini sağlar.
Excel'de hücre değerine göre otomatik olarak e-posta gönderme
Diyelim ki Excel'deki belirli bir hücre değerine dayalı olarak Outlook üzerinden belirli bir alıcıya e-posta göndermek istiyorsunuz. Örneğin, bir çalışma sayfasındaki D7 hücresinin değeri 200'den büyük olduğunda, otomatik olarak bir e-posta oluşturulur. Bu makale, bu sorunu hızlıca çözmek için size bir VBA yöntemi tanıtır.
En İyi Ofis Verimlilik Araçları
Kutools for Excel ile Excel becerilerinizi güçlendirin ve benzersiz bir verimlilik deneyimi yaşayın. Kutools for Excel, üretkenliği artırmak ve zamandan tasarruf etmek için300'den fazla Gelişmiş Özellik sunuyor. İhtiyacınız olan özelliği almak için buraya tıklayın...
Office Tab, Ofis uygulamalarına sekmeli arayüz kazandırır ve işinizi çok daha kolaylaştırır.
- Word, Excel, PowerPoint'te sekmeli düzenleme ve okuma işlevini etkinleştirin.
- Yeni pencereler yerine aynı pencerede yeni sekmelerde birden fazla belge açıp oluşturun.
- Verimliliğinizi %50 artırır ve her gün yüzlerce mouse tıklaması azaltır!
Tüm Kutools eklentileri. Tek kurulum
Kutools for Office paketi, Excel, Word, Outlook & PowerPoint için eklentileri ve Office Tab Pro'yu bir araya getirir; Office uygulamalarında çalışan ekipler için ideal bir çözümdür.
- Hepsi bir arada paket — Excel, Word, Outlook & PowerPoint eklentileri + Office Tab Pro
- Tek kurulum, tek lisans — dakikalar içinde kurulun (MSI hazır)
- Birlikte daha verimli — Ofis uygulamalarında hızlı üretkenlik
- 30 günlük tam özellikli deneme — kayıt yok, kredi kartı yok
- En iyi değer — tek tek eklenti almak yerine tasarruf edin