Excel elektronik tablosundan Outlook hatırlatıcıları nasıl oluşturulur?
Bu makale, bir Excel elektronik tablosundaki verilere dayalı olarak Outlook hatırlatıcılarının nasıl oluşturulacağını anlatmaktadır.
VBA kodu ile Excel elektronik tablosundan Outlook hatırlatıcıları oluşturun
VBA kodu ile Excel elektronik tablosundan Outlook hatırlatıcıları oluşturun
Eğer Excel'den Outlook hatırlatıcıları oluşturmak istiyorsanız, lütfen aşağıdaki adımları izleyin.
1. Aşağıdaki ekran görüntüsünde gösterildiği gibi sütun başlıklarını ve ilgili hatırlatıcı alanlarını içeren bir çalışma sayfası oluşturun.

Not: "Meşgul durumu" sütunu için, sayı "2", hatırlatıcının Outlook takviminizde "Meşgul" olarak gösterileceği anlamına gelir. Bunu gerektiği şekilde "1 (Tentatif)", "3 (Dışarıda)", "4 (Başka bir yerde çalışıyor)", veya "5 (Ücretsiz)" olarak değiştirebilirsiniz.
2. "Alt" + "F11" tuşlarına basarak "Microsoft Visual Basic for Applications" penceresini açın.
3. "Microsoft Visual Basic for Applications" penceresinde "Ekle" > "Modül"'e tıklayın. Ardından aşağıdaki VBA kodunu Kod penceresine kopyalayın.
VBA kodu: Excel elektronik tablosundan Outlook hatırlatıcıları oluşturun
Sub AddAppointments()
'Update by Extendoffice 20180608
    Dim I As Long
    Dim xRg As Range
    Dim xOutApp As Object
    Dim xOutItem As Object
    Set xOutApp = CreateObject("Outlook.Application")
    Set xRg = Range("A2:G2")
    For I = 1 To xRg.Rows.Count
        Set xOutItem = xOutApp.CreateItem(1)
        Debug.Print xRg.Cells(I, 1).Value
        xOutItem.Subject = xRg.Cells(I, 1).Value
        xOutItem.Location = xRg.Cells(I, 2).Value
        xOutItem.Start = xRg.Cells(I, 3).Value
        xOutItem.Duration = xRg.Cells(I, 4).Value
        If Trim(xRg.Cells(I, 5).Value) = "" Then
            xOutItem.BusyStatus = 2
        Else
            xOutItem.BusyStatus = xRg.Cells(I, 5).Value
        End If
        If xRg.Cells(I, 6).Value > 0 Then
            xOutItem.ReminderSet = True
            xOutItem.ReminderMinutesBeforeStart = xRg.Cells(I, 6).Value
        Else
            xOutItem.ReminderSet = False
        End If
        xOutItem.Body = xRg.Cells(I, 7).Value
        xOutItem.Save
        Set xOutItem = Nothing
    Next
    Set xOutApp = Nothing
End Sub
Not: Yukarıdaki kodda, "A2:G2" oluşturmak istediğiniz randevulara dayalı veri aralığıdır.
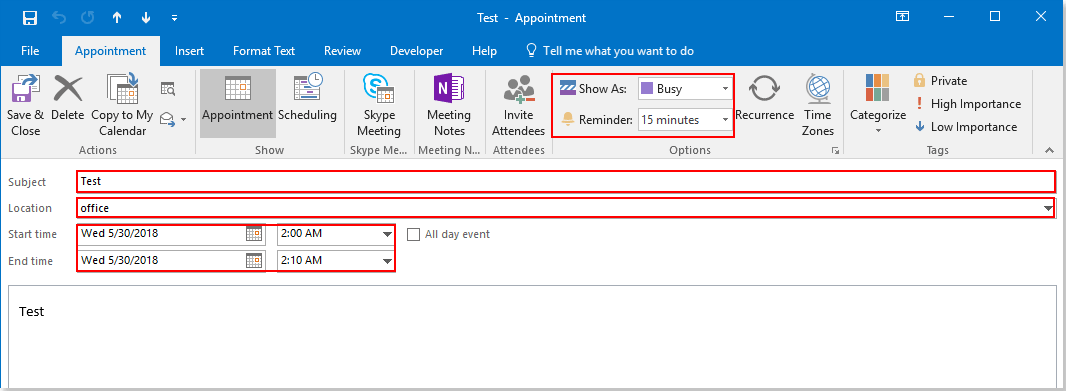
4. Kodu çalıştırmak için "F5" tuşuna basın veya "Çalıştır" düğmesine tıklayın. Daha sonra belirli alanlarla tüm randevular birden Outlook takviminize eklenecektir.
Ardından, sonuçları görmek için Outlook Takvim bölümüne gidebilirsiniz. Ekran görüntüsüne bakın:
En İyi Ofis Verimlilik Araçları
Son Dakika: Kutools for Outlook Ücretsiz Sürümünü Sunmaya Başladı!
Yepyeni Kutools for Outlook ile100'den fazla etkileyici özelliği deneyimleyin! Şimdi indir!
📧 E-posta Otomasyonu: Otomatik Yanıt (POP ve IMAP için kullanılabilir) / E-posta Gönderimini Zamanla / E-posta Gönderirken Kurala Göre Otomatik CC/BCC / Gelişmiş Kurallar ile Otomatik Yönlendirme / Selamlama Ekle / Çoklu Alıcılı E-postaları Otomatik Olarak Bireysel Mesajlara Böl...
📨 E-posta Yönetimi: E-postayı Geri Çağır / Konu veya diğer kriterlere göre dolandırıcılık amaçlı e-postaları engelle / Yinelenen e-postaları sil / Gelişmiş Arama / Klasörleri Düzenle...
📁 Ekler Pro: Toplu Kaydet / Toplu Ayır / Toplu Sıkıştır / Otomatik Kaydet / Otomatik Ayır / Otomatik Sıkıştır...
🌟 Arayüz Büyüsü: 😊 Daha Fazla Şık ve Eğlenceli Emoji / Önemli e-postalar geldiğinde uyarı / Outlook'u kapatmak yerine küçült...
👍 Tek Tıkla Harikalar: Tümüne Eklerle Yanıtla / Kimlik Avı E-postalarına Karşı Koruma / 🕘 Gönderenin Saat Dilimini Göster...
👩🏼🤝👩🏻 Kişiler & Takvim: Seçilen E-postalardan Toplu Kişi Ekle / Bir Kişi Grubunu Bireysel Gruplara Böl / Doğum günü hatırlatıcısını kaldır...
Kutools'u tercih ettiğiniz dilde kullanın – İngilizce, İspanyolca, Almanca, Fransızca, Çince ve40'tan fazla başka dili destekler!


🚀 Tek Tıkla İndir — Tüm Ofis Eklentilerini Edinin
Şiddetle Tavsiye Edilen: Kutools for Office (5'i1 arada)
Tek tıkla beş kurulum paketini birden indirin — Kutools for Excel, Outlook, Word, PowerPoint ve Office Tab Pro. Şimdi indir!
- ✅ Tek tık kolaylığı: Beş kurulum paketinin hepsini tek seferde indirin.
- 🚀 Her türlü Ofis görevi için hazır: İhtiyacınız olan eklentileri istediğiniz zaman yükleyin.
- 🧰 Dahil olanlar: Kutools for Excel / Kutools for Outlook / Kutools for Word / Office Tab Pro / Kutools for PowerPoint